Hello everyone how are you all?I am typing this up just after I've come back from the gym & I'm soooo sore.....I'm certain now my sons really are trying to kill me!! lol.
Ok so its Tutorial Tuesday over at Noor Design UK & this one is a requested one.
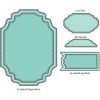
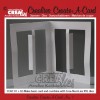
I was asked to do a tutorial on a Crealies die, its Crealies die Create A Card No.1
You can go onto you tube & watch all the Crealies video's on their dies, the one I watched was not in english & I wanted to see if there was a simpler way.
Now this is VERY photo heavy so grab yourslef a cuppa & a biscuit or 2. Hopefully the tutorial will make sense to you.........the end result certainly looks nice.
Ok so the basic tools you need are as follows....
A4 or 12x12 Cardstock
Designer Paper of the same size (A4/12x12)
Scissors
Pencil, eraser & ruler
Glue
Masking Tape
Die Cutting Machine
To use this die you also need to go to the Crealies website
here & download the template & instructions
here. You will need to print off the template.
Now for some reason my printer would not print the whole template out, it did 95% of it but you see the dotted lines going around it....well it missed off 2 lines. So as it printed off the corner of the dots I used my ruler & drew the lines in that were missing.These are just there to cut around........
So after you have cut around the dotted lines you then put the template onto your cardstock to draw around...........
...........or you can just measure & cut the sizes wrote here....
142mm x 272mm then cut it out.
You then do the same with your designer paper. I did it this way as I didnt want a band a white card around the edge. I think it looks better if the paper goes to the edge.
Now the first time I cut this out I cut out first the cardstock, then used the die. I then cut the paper & then used the die. Problem was if you are not exact the paper does not marry up properly to the cardstock...........you can just below the watermark where it was wrong & did not align ;-(
So I decided to try it a different way.........this was after I got out of my huff from ruining Maja Design paper lol.
First though attach sticky tape to the top & the underneath of the Crealies die. The photo above shows the tape on top, there is also tape underneath in the same place. The tape is to keep things in place.
So you get the die & make sure the cutting edge is facing up & you align it up with the shape on the template........(the same shape is on the right side but in reverse).
Once the die is in place you then line up your cardstock on top & then line up your designer paper on top of that. Using masking tape I taped the corners so they didnt move whilst die-cutting.
The tape on the die keeps the cardstock in place...........but you must align the cardstock up with the template underneath.
Then run it through your die-cutting machine. Make sure your machine is wide enough for this.
Once cut this is what they will both look like, the cuts will be in exactly the same place. If when you peel the tape off your cardstock it takes some of the card do not worry as the paper will cover it & then you will also be putting something else there later on as well anyway.........so all will be hidden.
Now leaving the tape on the left side attach more tape to your die underneath & do exactly the same for the right side as you did with the left. Alinging the die with the shape on the template.
Then put the cardstock on top again, aligning it with the template underneath. The firstpart that was cut out you can align with the shape on the template & the tape you left there will keep the cardstock in place once again.
Then do the same with the designer paper, again taping down the corners so nothing moves. You want everything to stay in place whilst it is going through the die-cutting machine.
After you have run it through the die cutting machine, line both the cardstock & the paper up against the template.
You will see it says 'platform' along the top & in the centre there is a dotted line. With your ruler draw a line going down the centre & then score a valley fold, making sure you run your scoring tool up & down a few times to score through the cardstock & onto the paper.
On the middle parts of each side (just below my watermark) there is a line in the centre that the die made, you now need to score these in a mountain fold. Again running the tool up & down to go through cardstock & paper.
This is what it should look like, the centre I did the valley fold as that's where the card will fold in half & then in each window you score a mountain fold.
Next apply wet glue all over the cardstock. Wet glue is the best thing to use as it allows movement while you are getting it in the exact place it needs to be.
With your designer paper, starting in the centre at the fold rub down one side of the paper to the cardstock..........
......then rub down the right side onto the cardstock, aligning the paper up with the card below.
Once dry I then went over all my folds again.
Then on one side of the mountain fold in the window apply wet glue, the place where my watermark is shows you where to apply the glue. You are putting the glue on the shorter part.
Then attach the image you want to place there. Make sure this is no bigger than that window to allow it to move when opening & closing the card.
Do the same on both side & wait til they dry.
You can see on the left photo that the image or sentiment you put there is only going on one side of that mountan fold you created. Lie it flat while it dries.
Once dry you can now decorate as you wish.
Here is the finished card. I love the look of this I think its so pretty, it would be fab to use with stamped images, digi images, nice sentiments or even photo's.
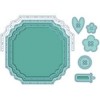
This is a photo of what is in each window. I made a frame using one of my favourite dies, yes the LDRS Fancy Squares. I used the large & small die & using them together to cut out a frame.
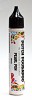
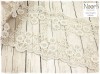
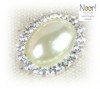
I added pearl dots using a pearl pen & also some pearl trim.
Below is the links to items used which are all from Noor Design UK. Why not pop on over to see the other Crealies dies, why not try one yourself. If you try this one leave a comment on my blog & I will pop over to look & leave you a comment so you know I've been. I would love to see more of these cards made using this die.
Ok thats it, if you have made it this far then well done...........if you understand my tutorial then even better lol.
Thanks for sticking with me in this looooong post, you all totally rock mmwah.
Lotsa hugs Vicky xxx