My Lovely Friends

Showing posts with label whimsy. Show all posts

Tuesday, 13 December 2016

Noor Design UK DT Post

Hello everyone, can you believe less than 2 weeks to the jolly fella with a wobbly belly eeeekkkk!!!

Ok so today I thought I would show you 2 cards I've made with non-christmas paper.........in fact I've used paper from an Halloween release....... I love to adapt things to fit other occasions, it gives our brains a stretch lol.
Now my daughter as some of you know is severely disabled & she goes to daycare monday-friday. Her taxi driver & escort on the taxi are the best you could possibly wish for & we buy gifts for them every year. Now the driver & his lovely wife are Gothic lover's......yes scares the bee-jesus out of me but I wanted to make them cards suited to them.....so it had to be black....eeekkkk

This first card is an anniversary card for them......ok their anniversary is not until October so I'm well prepared lol. Actually their anniversary is 31st October....yep halloween they got married lol, but they are goth's so its appropriate for them.
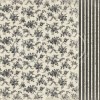
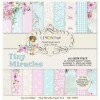
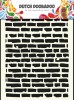
Here is a Black & White Anniversary card........to be honest I know a lot of people that would like this sort of card who are not Goth's lol. I absolutely love this paper from Pion's Halloween release & love that one side is non-halloween........seriously you should buy this paper collection its so so pretty!!! 
I forgot to put the sentiment on & took photo's but on the last photo I remembered lol....I took these photo's a week ago though & hadnt quite finished my 2nd card then.

The matting on this card is Pion Design Palette Black l, its lovely to use as matting & matches the Pion paper beautifully. All papers were machine stitched. I also added doilies using a doily die.

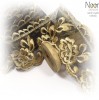
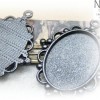
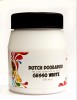
The heart is Scrapiniec & I sprayed it white & added a Black Oval Frame to the centre & a resin keyhole from my stash.
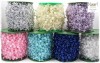
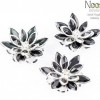
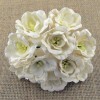
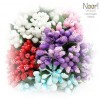
The white flower was made with white foamiran, I've kept it basic because of the black & silver centre I added. The black flowers are from my stash & the black organza ribbon is tied into a bow & heat shrunk with my heat gun. I also added in some pearl string there as well.

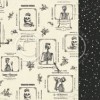
This is the inside but when I did it I thought......I dont want to cover up those gorgeous clocks by putting somewhere to write a sentiment....... So I had an idea & as I had already glued it all to the inside so had to get a wee bit creative.........if you look closely you can tell by the stitching ;-) Or look at the next piccy lol.
The scalloped bottom bit I fussy cut form the 12x12 'Midnight Spell' sheet & then added it on to make a pocket for some tags to write on.........when the tags are removed they will see those beautiful clocks.
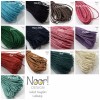
I made 2 tags, one with an Anniversary verse on & added waxed cord. The chain & charms are from my stash, I added chain to mirror the clocks.....I thought it would be a nice added touch. The larger tag I cut the paper from the same sheet & backed it with card to make it stronger.


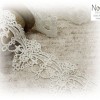
Have you seen the beautiful lace I've used.......I attached it going up the side so it hid less of the paper....I think it suits it going up the side.

Ok so for my 2nd card I've again used papers from the same collection & again they are for the same people so need to incorporate black............this was more of a challenge for a christmas card...
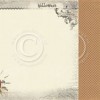
The paper on this card is all 1 sheet & I did inside as well....I've used 'October Garden'. For the matting behind the image I've used a mixture, the black one is 'Beyond The Grave' & the bottom layer is Pion Design Night Before Christmas 'Just A Peek'.

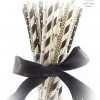
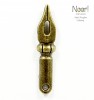
I added a straw & then added sentiments cut from Night Before Christmas 'Border's' Sheet. The bingo card is from the same collection & I added a Pen Nib to it......love these pen nibs.

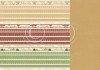
I added black & gold lace & then added a bit more black lace from my stash along the top....I tried get in as much black as I could muster lol....
The gold ribbon is from my stash & I made a cabochon for the centre using one of the circles form the Night Before Christmas Tags sheet & then I added a small charm.

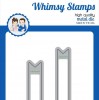
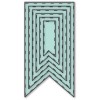
As you can see I did add a sentiment to the anniversary card lol....I used the Whimsy Banner die to cut it out. 
I have to say both of these cards were out of my comfort zone as I'm not usually one for using black. However I did enjoy doing them & I'm quite happy with how they turned out.....lets hope the recipients like them!!
Hope I've inspired you to use papers for occasions other than they are meant for......halloween papers to make an Anniversary Card & a Christmas Card......so not just for halloween ;-)

Thanks for stopping by, big hugs to you all.
Vicky xxx


The products used can be ordered in the Noor! Design U.K. webshop:

Tuesday, 1 November 2016

Deep Ocean Challenge DT Post

Hello again everybody.
I'm back with my DT post for Deep Ocean Challenge blog as we have a new challenge........yep that fortnight went by so fast didnt it.....they go faster & faster I'm sure!!
Anyhoo's the challenge this time is....drum roll please ;-)
Use DIES &/OR PUNCHES
We are sponsored for the last time by.......
http://www.liveandlovecrafts.com/
Now come one we all love both of those, ok for me its more dies. My arm hurts when I get punches ;-) Just kidding hee hee but I do love my dies a LOT more!!
Quite a few dies but I've not gone over-board but thats because I want this oh so pretty Tilda to shine out. She was the first one I coloured up when I got my new stamps, & I mean I coloured that day lol, she is my fave!! She is of course London Tilda & she came with the Phone Booth 3D die......how awesome!! I have coloured up a few of them, although they havnt made it to cards yet, this card I made about 2 weeks ago.

She was of course coloured with distress inks & I added glitter to her dress, just the bottom part peeking out the coat & I added pearl dots around her.

Added bows with gorgeous seam binding from Noor Design UK & a bit of bling from my blingy stash ;-)

Here you can see better the Phone Booth in 3D, I also added a phone charm, wax cord & a flower from my stash to the top of the booth.
The gorgeous pink lace is from Noor Design UK.

I've been after the Magnolia Bride Bow die forever & the lovely Tracy ordered it me from Magnolia & she still has one in stock right here in her store if you are wanting one.

The image was cut out using Memory Box Stitched Oval dies, I also used more Magnolia dies & the sentiment is a Whimsy Bold Banner's sentiment & cut out using the matching die here. The papers are Maja Design Vintage Romance papers which are from Noor Design UK & the flowers are also from there.

Ok thats definately it from me today, I think seeing me twice is more than enough lol.
Do pop on over to see my fabulous teamies creations & leave them some love as they really are so so talented.

I will love ya & leave ya now, tatty bye peeps & thanks for stopping by, it means a lot.
Lotsa hugs Vicky xxx

Challenges I'm Entering.........
In The Pink - Lots Of Layers


Tuesday, 31 May 2016

Noor Design UK DT Cards - Graduation and Recycling

Hello everyone, Vicky here hope you all had a lovely weekend & those who had Bank Holiday hope you enjoyed the long weekend. I certainly did & spent the whole weekend with my family.

Today I have 2 projects for you.......I know I'm on a roll just lately....although I am running a wee late today....sssshhhhh dont tell the boss ;-)
Ok so we have 2 Graduation cards today, one for a female & one for a male.......yep another male card & its CAS..........OMG whats happening to me lol.
Ok ladies first of course ;-)
Not so much foofiness on this one...well not much compared to my normal standard lol. Quite a simple-ish card with feather die cuts & real feathers underneath...
A few flowers & some frill around the image.

The paper I actually recylced & used the cover sheet on the Lemoncraft 'Tiny Miracles' 6x6 pad. 
The back cover I used on my 2nd card below as a backing underneath the top layer.......I recycled on each card ;-)
 I also embossed with a Dutch Doobadoo mask art & then with the mask art still in place chose a few of the circles/bubbles to add Structure Paste. 

The rubber stamp I used is a Whimsy stamp by Art Miran called 'Aleema' & she is coloured with distress ink markers & refills.
I also added pearl dots around her in places.

Ok for my next card which is also a graduation card & is for a male.
I have used no DP at all on this. Insteda I've used a Dutch Doobadoo mask art again, embossed it first then added structure paste all over. I've used the brick one as its like the building blocks to the future once you have graduated.

Here is a closer look at the brick work with the structure paste.

The rubber stamp I've used is from Magnolia's latest 'We Made It' collection & this one is called 'I Made It Edwin' & again I coloured him in distress markers & refills & then fussy cut him out & placed him on foam pads, then popped him onto the Little Darlings dies.

The sentiment is from my stash & I've just realised I forgot to add a sentiment to the first one oops.

Well thats it from me hope you like my cards today.

Dont forget come back tomorrow when we will have a brand new challenge for you & you will love it ;-)

Thanks for stopping by.
HUge hugs Vicky xxx


The products used can be ordered in the Noor! Design U.K. webshop: