Hello everyone how are you all? Hope you are having a fabby weekend.
I'm poorly at the min with bad pain & the flu......courtesy of my eldest son who gave it to me as a present lol.
Anyhoo I'm quite busy.....ok I lied & I'm very busy at the min with orders & DT work etc etc....however although I cannot show you what I've made I've still got a few things you havnt seen yet.
Now this is something I made a few weeks ago when my thumb was really poorly. As you may remember I said I was pushing myself more this year in the crafty way....not just doing cute, or vintage or foofy........but trying a lot more to step outside of my comfort zone but also do new things....or at least try...
WARNING PHOTO HEAVY

Ok so I've got a couple of these frames & had them quite a while.......they were something I had in the bedroom, there is still one in there on hubbys bedside....maybe I will try pinch it from him lol.
Anyway I decided to have a play with it. Took the back off & took the glass out......

.....then painted it with black gesso which you can get from Noor Design UK.
I then added white gesso & lots of other things til I had this........

I decided that this was gonna be for me, for in my craft room as once its decorated I'm having it in pastels......so this will sit on my window sill.
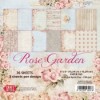
The paper at the back is Craft & You 'Rose Garden' which you can get here. Though my sheet is out of the 12x12 pad here.

I added some gorgeous pearl trim all around the edge, the trim is stuck down but the pearls hang loose.....so there is movement on the pearls.....does that make sense lol.
I also added a metal corner which I painted white........as I could only find a silver one & a bronze one lol. All of my craftroom is still not unpacked....I have a lot of stuff still in my old craft room lol.

I added flowers & a few butterflies using a Joy Crafts die here. The writing is from an old rub on wedding set that I've had for a few years & never used....til now lol.
You can also see all the crackles where I've added Crackle Paste here & there......by adding it in different thicknesses you get different cracking.

The sides got painted & crackled as well......there is also bits of embossing on the frame as well....I was experimenting...you know when the ideas come into your head & think 'why not lets try it' lol.

Using Joy Crafts 'Old Letter With Rose' clear stamp I just stamped the postage part onto the frame with versamark ink & then heat embossed it with white powder.

Ok will try remeber what I added to this part lol. I wanted different textures on this so added hessian in 2 different colours as well as Cheesecloth. I added layers of differnt papers from the Crafts & You Rose Garden pad, both the 6x6 & the 12x12. I used different dies to cut the layers out, postage was one & I also used Little Darlings Gilded Oval die (one of my faves) & a LLLC Tag Die.
The resin bit was actually from a mould which you can get here with this clay....I got these for crimbo off hubster. However after I made it & painted it & aged it a little I then accidently broke it......so I used the larger half here & the smaller bit is at the top just peeking out lol....was not going to throw it away lol.
Bling & flowers are all from Noor Design UK.

Added another metal corner down the opposite corner & some more writing from the same rub on wedding set.
You can also see the dimension more on this photo.

Last photo now peeps lol. Other bits I added were Tim Holtz Filmstrip Ribbon, Birch Heart, Star Shaped Wish Bottle, which was filled with german glass glitter. I also added wooden heart button from my stash, a doily & the gorgeous Scrapiniec Frame that the photo of me & hubster is on....its a photo from about 8 years ago I think.....my hair isnt this long anymore & its also blonde now lol.
I have to say out of every project/creation I've made so far this year this has been my favourite. I really really enjoyed doing it...even with a bad thumb at the time lol. Its good to push ourselves even if it takes more time you just do it bit by bit.....I think this took me 2-3 days doing bit by bit, an hour here & an hour there....but by doing bit by bit I kept thinking of other ideas lol, so they would then get added lol.
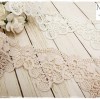
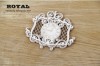
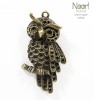
Ok my lovelies I'm so sorry the post was so long & you now deserve to go shopping so why not get along to Noor Design UK.....Tracy has added new goodies as well as the fabulous Little Darlings pre-order is there & omgoodness the things they are bringing are sooooo yummy including Winnie from Polkadoodles.....I have a few of their images as I love Winnie she is so darn cute. I just need get her onto creations.....they are coloured so I'm halfway there lol
Here is a sneak peek for the goodies coming....


Soooooooo cute & pretty & there is more so you will have to pop over ot see the rest as well as new items added......go on treat yourself. You deserve it after listening to me ramble on & on & on.....;-) Click here to see more of the pre-order & click here to see the new goodies just in.
Enjoy the rest of your weekend peeps & thank you so much for stopping by.
Lotsa hugs Vicky xxx
Challenges I'm Entering.......
Simon Says Stamp - Anything Goes
Crafty Gals Corner - Anything Goes
Crafts & Me - New Stash (tim holtz ribbon, plaster mould & clay, lace around edge)
Simon Says Stamp - Anything Goes
Crafty Gals Corner - Anything Goes
Crafts & Me - New Stash (tim holtz ribbon, plaster mould & clay, lace around edge)