My Lovely Friends

Showing posts with label Noor Design and Dutchdubadoo. Show all posts

Thursday, 28 May 2015

Noor Design UK DT Creation - Tea Party

Hello everyone, guess what.........its me again lol. Yes I'm here on my normal posting day for the Noor Design UK Blog & today I have 2 items again to show you. I get carried away when playing with the Noor Design & Dutch Doobadoo items lol.
I have used the new gorgeous papers 'Afternoon Tea', inked the edges & machine stitched them.
I have also used the new fabulous 'Afternoon Tea Pictures & Paper pad', doesn't that cake look so yummy!!! I loved this image as soon as I saw it in my DT pack. 
I machine stitched around the edge then matted it onto the Frame die, which also got inked with Tattered Rose on the raised parts.
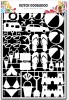
I used my favourite die under the flowers, the 'Swirl Leaf die'. The knife & fork are from the Dutch Doobadoo 'Craft Art A5 Kitchenware' & I heat embossed themw ith silver embossing powder.
I tied them together with Vax Cord & hung a Teapot charm. I added White Gesso here & there.
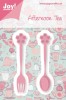
The shiny Fork & Spoon is from the new 'Teaspoon & Fork' die. I folded over some tin foil a few times & then cut them out, shaped them & then tied together with vax cord.
I've used the gorgeous Heart Filled With Butterflies die again, only not as fancy as yesterdays card lol. I love the different ways to use these dies though.
Also along the top is the fabulous 'Cups & Teapot Edge Die' which I also inked with Tattered Rose on the raised parts.
This is the other part of this set & I've used the super fabulous Dutch Doobadoo 'Card Art Teapot' & used the same papers as on the card.
In the centre I've used the gorgeous new 'Viewmaster die', I lurve this one & think its gonna get a LOT of use lol. I inked the edge with Pumice Stone.
This is the back of the teapot & I've agin used the Viewmaster die in the centre & another image from the 'Afternoon Tea Pictures & Paper pad', this one I cut into a circle. Again I used the fork & spoon die & cut them out in tin foil, I tied a piece of lace around them. The spoons on the spout are from the Kitchenware set & again embossed with silver embossing powder.
At the top on the lid is also a cup from the Kitchenware set which I painted with white gesso.

I added a cute Tilda with her bag filled with goodies for the Tea Party ;-)
In the centre of the Viewmaster I've used the Stamp Floral Frame, stamped it in cocoa memento & fussy cut it out, then added the words Tea Party.
Of course added 2 lots of lace & some pretty flowers.

Well that's it from me, I promise you wont see me again now til next week lol.
All links to items used are below as always. Dont forget if there is anything you see in the store here & its out of stock Tracy will order it in for you. 

Here is the link to the Dutch Doobadoo Card Art Teapot & the Craft Art A5 Kitchenware.

Take care lovelies, 
The Vax Cord, Kort & Godt rolled flowers & doily are from Live & Love Crafts.


The products used can be ordered in the Noor! Design U.K. webshop:

Wednesday, 27 May 2015

Noor Design UK DT Cards - All About Love

Hello everyone I'm here todaywith a project for Noor Design Uk, I'm standing in as our lovely Fleur sadly stepped down as she is so busy........she will be a huge miss here :-(
So Ive stepped in to cover this week, although you also have to put up with me tomorrow as that's my normal posting day.
Ok so I've made 2 cards just using gorgeous Dies from Noor Design & fabulous Mask Arts from Dutch Doobadoo & lots of embossing ;-)
Lots of piccies today peeps, sorry ;-)
Both cards I've made using Ivory card & matted up with a bit of white.

The bottom layer I dry embossed using the 'Mask Art Flowers', I love these mask arts from Dutch Doobadoo they really are so versatile. I plan on collecting them all lol.

I also dry embossed the circle shape as well & layered that onto scalloped card in white & then onto the 'Square Frame die' which was heat embossed with Ivory Fran-tage on the raised parts only.

I used 2 different leaves dies, these are my favourite ones. I also used the 'Just Married - Wedding' die but just the wording part & heat embossed it with gold embossing powder. I then attached that to the larger banner die & created an arch with it across the frame.
I added gorgeous flowers & hearts shaped in each corner.
This is my 2nd card using the gorgeous new 'Heart Filled With Butterflies' die, again using Ivory card. On this card on the bottom layer I used the 'Mask Art A5 Grunge' from Dutch Doobadoo & dry embossed it onto the card. I matted it onto white card & then added lace & machine stitched around the edge.
On the 'Heart' die I heat embossed all the butterflies with Ivory Fran-Tage. I did this by using a rangers clear embossing pen.
This photo shows you it complete, tbh the photo does not do it justice as it really looks so pretty in real life & adds a new dimension to the die. I cut & embossed this die 3 times.........

...........2 of the hearts I matted onto scalloped hearts. The 3rd 'Heart' I cut & embossed I cut out all the butterflies & attached them just by the middles to make them 3D on the top heart.
I also added pearls that I cut form the lace so the hearts could be laid flat, it seemed a shame to throw them away...........so I recycled them lol.

I added the 'Sending Love xoxo & Carpe Diem' die to the top & bottom corners. I heat embossed them with Gold embossing powder.

The 2dn heart I glued on with Collall 3D glue, I also glued the bottom layer to the card using this glue to raise it all up. 

I added a Butterfly to each card using different dies & heat embossing them with gold embossing powder.
I really enjoyed making these cards & I was actually pleased with the way they turned out. They look better IRL..........its hard for our photo's to do our projects justice isn't it.

The gorgeous lace is from Live & Love Crafts which I've had for quite a while.........I was keeping it to stroke lol. The flowers are also from LLC.

Anyhoo's that's it form me, sorry about the long post & lots of photo's. Hopefully these cards have inspired you in some way.
Pop on over to Noor Design UK to see all these fabulous products & much MUCH more. Seriously I cant get enough of these products & all the products inspire me to make more than just my usual cards.

Take care & enjoy your day
Lotsa hugs Vicky xxxxxx


The products used can be ordered in the Noor! Design U.K. webshop:
Thursday, 14 May 2015

Noor Design UK DT Project - Live, Love, Laugh

Hellooooooo everyone, I'm here today with my DT Project for the Noor Design UK Blog. I'm showing you something I made for my daughter's new bathroom when its finished.
I have to say I enjoyed doing this soooooooo darn much & although it took me quite a few hours & I didnt get finished until nearly midnight last night.......well I'm actually pleased with it. Let me tell you this doesn't happen often.

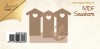
Ok so I've been playing with the new MDF Beach Huts & as Natalie's bathroom is gonna be shabby chic theme, I've made the huts shabby chic.
Lots of pics I'm afraid, it does look better in real life but at midnight its hard to get good photo's.
You get a set of 3 huts, an anchor & the base for it all to sit on. Of course there are different ways of using this set as my uber talented teamies will be showing you. Also the lovely Bev showed you a different way earlier in the week.
I tried something different with mine, well different for me anyway lol.

Ok so the base & the anchor I painted with Black Gesso first as I wanted a slightly different tone to these. (Excuse the board its on, I use an old calender backboard for painting on, as I use the large calenders they are perfect for this.....its recycling lol.)
All the huts I painted with white gesso.
I then used the new Mask Art A5 Grunge & some structure paste & did a random pattern on top of the black. I should have took pics but I forgot :-( Once the structure paste was dry I then went over it using a watered down gesso & different brushes.
I've gone over parts with Perfect Pearls adding touches of lilac here & there.
The 'Relax' wording is from the Grey Board Art Maritime Text English & Dutch set & I painted it with white gesso.
The 'Lifebuoy' is from the die set & I inked it with Milled Lavender & added bakers twine around 2 sides.

As you can see the base I did the same as the Anchor, I just wanted these to look different to the huts.
The shape at the bottom of the hut here is a 'Sandcastle' from the new Paper Art A5 Holiday set & I heat embossed it with shabby pink fran-tage.
I stamped a small sentiment on each hut using the 'There Are No Little Dreams' stamp set. Each little sentiment is to do with each word I've put at the top of each hut.
At the top of this one I wrote 'Laugh' using the new Stencil Art A4 Alphabet 3..........LOVE THIS!!!! Its awesome & will be getting a lot of use ;-) Added touches of lilac using a glitter pen then wiping it away to leave smudges here & there.
Seagulls from a die set, links below post.

At the top of this hut I wrote 'Love' & the sentiment is again from the same stamp set. 
I decorated the hut by using the Mask Art A6 Clouds, the clouds I used structure paste adding texture & the rest I used different shades of perfect pearls to create the blue sky.
I tied string around a small part & attached a small charm, I also added a bark star.......adding gesso here & there.
On this hut I wrote 'Live' & again stamped a small sentiment again. So all the huts read one of my favourite sayings 'Live, Love, Laugh'.

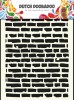
On the first & last hut I used the Mask Art A5 Bricks & used structure paste to place bricks up each side of the hut. I then used the Mask Art A6 Clouds again using white gesso for the clouds & a range of perfect pearls for the sky. 9will try replace this last pic with a better one tomorrow, oops I mean later today lol. This is scheduled & its really 2am, yep time for bed I think)

I really am happy with the way this has turned out, infact when my youngest son saw it in the kitchen when I had finished........he said 'WOW'....... I took this as a good thing lol. Wish the photo's showed it properly but never mind.

Why not pop yourself along to Tracy's shop here & check out all the new items she has got in & getting in. Dont forget even if it says out of stock you can still place the order or get in touch with Tracy......... So grab yourself a cuppa & pop along & fill that basket ;-)


The products used can be ordered in the Noor! Design U.K. webshop: