Hello everyone how are you all?
Well between Tracy at Noor Design UK & myself we have decided that 1 Tuesday a month it is going to be 'Tutorial Tuesday'for the Noor Design UK Blog.......if I can get my brain working more it may be more often. If there is anything you would like a tutorial of just leave a comment & I will try my best get a tutorial done. Some will be photo tutorials & some will be video's, I have a few planned already & of course there will be many more to come, hopefully you will enjoy them ;-)
So today is the first 'TUTORIAL TUESDAY' & today I am showing you how to make a wrapper for a chocolate bar.........whether it be for someone feeling a bit low or someone poorly or even for birthdays & easter. This is perfect for a little bit of something to show someone you care. I think handmade always shows someone just how special they are.
This is the first one I made 'here' & I got asked if I would do a tutorial, so I thought I would make this first.
Ok so the basic materials you will need are.........

Score Board
Guillotine/Scissors
Tape/Glue
12x12 Cardstock
Designer Paper
Magnets/Ribbon
Pencil & Eraser
Ruler
Distress Ink
Cup of black tea is optional lol.
You also need.....
 A bar of chocolate.
You also need.....

You will also need whatever materials you want for decorating it afterwards i.e. Flowers, Dies, Tags, Gems, Pearls......whatever your heart desires lol.
Ok so to start you need a piece of 12x12 Cardstock, I've used white so you can see score lines & pencil markings clearly but the choice of colour is up to you.


So these measurements are going off a 100g bar of chocolate, adjust the sizes to the bar of chocolate if different size.
Score at 1 past 1/4 mark & then score at 7 & again at 1 past 71/2. If you dont have score board the measurements are 1.5cm then mark 18cm & again at 19.5cm & score these lines/

Cut off the excess after the last score line. So the width of this should be 19.5cm.

Then turn the card around & score at 1 before 3 1/2 & again at 4. Then score again 1 after 8 & again at 8 3/4. Score lastly at 11 1/2 & cut off the excess.
Measurements for without scoreboard are 8.5cm, 10cm & then again at 20.5cm & 22cm & lastly at 29cm.Score down all these lines & cut off excess after 29cm.

Fold along all the score lines. You can also see I've wrote on Top, Middle & Bottom......this is the layout, the bottom being where the bar of chocolate will go.

From the bottom cut along the 4 little crease marks & fold the flap in........do NOT cut off this little flap, just cut down to the score line that runs all the way down.

From the 2nd cut measure 6.5cm & then cut the excess off like in the photo above.

Next measure cardstock for matting,this is optional but I think it strengthens it & makes the whole thing stronger & more sturdy.
I measure down in increments of 1mm, so deduct 1mm from each side. So for example the first part, the width is 8.5 mm but instead measure the width of the matting 8.3mm.....deducting 1mm from each side. Do the same on the length as well, so all 4 sides. Dont forget to do the spines (thin strips)
I have also inked all the edges with pumice stone distress ink.

Now using wet glue or tape attach the cardstock to the base. I've used tape on this first bit to show you but I use glue as I think its stronger & you can slide it around to get the right position.

Just like the matting get your designer paper & measure that, deducting 1mm agan from all 4 sides on each piece. I have again inked all around the edges I also at this point machine sew all around the edges, this is of course optional.
The bottom part on the inside does not need paper as this will not be seen, so no need to waste pretty paper ;-)

I've also used this point to make a pocket for the top inside flap. I glue around the edge & place paper clips to keep it in place whilst the glue dries........the piece of folded card is just a scrap to keep a gap in the pocket. It makes it easier to slide tags in & out as instead of drying perfectly flat it dries with a slight bow (gap) in it so the pocket is not as tight.

Once the inside is decoratedits time to pick what you will choose to keep this box closed.You can used either magnet (what I used on the 1st one) or you can use ribbon/seam binding. You can also use velcro.
Here I've used seam binding. Before the bottom paper goes on I attach some tape & stick some seam binding to it.
A tip that I will tell you is put the seam binding directly onto the box, then add matting cardstock & designer paper on top. So the seam binding is in between the 2 layers of cardstock so you cannot feel it under the paper.

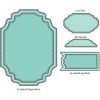
This part is optional & you can use whatever dies you wish to use. For mine I have used these dies from Little Darlings Fancy Rectangles die. I've cut 1 large in white cardstock, 2 small in cardstock, then 2 in large DP & 2 in small DP.

This is where I attach the other bit of seam binding, you can attach directly under the top part before adding the matting & the DP.
I have attached mine onto the cut out using the dies & then I've glued that onto the top flap that folds over the chocolate. The bulldog clip is just to keep it in place while the glue dries.

The photo on the left is a bit hard to see but I've put glue on the little flap & then attached the right flap onto that & then added wet glue to that & attached the left flap onto that. These become the sides that hold the bar of chocolate in. The paper clip is again to keep it in place while it all dries.

Once dry add your paper to match the rest of the box.
Then decorate how you wish to, adding an image or sentiment, flowers whatever you want on.

I have used lots of pearls & other yummy bits from Tracy's store. The Fancy Rectangle die that the scrapiniec is on is the reverse side of Memory Notes.

Some Scrapiniec to the front with a fabulous sentiment.

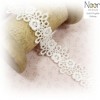
This is the inside, I've added lace along the pocket & a butterfly die-cut on the front with more pearls. I also cut a border from the Border's Sheet & a tag & sentiment for the pocket from 'Tags' & 'Memory Notes' sheets. I've also added waxed cord to the tag.

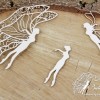
Added leaves using 2 different dies & pretty yellow flowers. The butterflies I cut from the 'Border's' sheet. I added dots with a pearl pen here & there amongst the scrapiniec & sentiment.
Well thats it from me, sorry for the long post & lots of photo's. Hope you have enjoyed this tutorial & hope you have fun making one of these, I can guarantee you that whoever you are giving this gift to they will love & appreciate it very much.
Thanks for stopping by & hope you enjoyed Tutorial Tuesday.
Lotsa hugs Vicky xxx
The products used can be ordered in the Noor! Design U.K. webshop: